facebooktwittergoogle+pinterestemail merss feed

Tuesday, October 9, 2012

Mod-Podged Trick or Treat Bucket


I have a little girl that absolutely adores Halloween, so when I got the chance to try out some new Mod Podge products, I knew exactly what I wanted to do.  I wanted to make my sweet girl her very own Trick or Treat bucket...a one of a kind bucket for a one of a kind girl.  


Mod Podge offers such an amazing array of products, but I really wanted to try their Glow-In-The-Dark Formula.  I knew it would be perfect for trick or treating on Halloween night.  What a fun way to keep your kiddos safe when it's dark outside!


I started with a paint bucket that I purchased at my local home improvement store for $4. Then I found some 12 X 12 scrapbook paper that fit her costume this year...a black cat.  I cut each piece 12 X 7 1/2 inches.


I held one of the pieces of paper up against the bucket and cut holes out for the handle.  Then I painted on a thin coat of the Gloss Mod Podge.  I didn't use the Glow-In-The-Dark formula for this, because I only needed to "glue" the paper to the bucket.


I placed the paper on the bucket then used the Mod Podge Squeegee to smooth the paper down and push out any wrinkles or bubbles.  This tool is a huge help, especially if you don't want to get your fingers sticky.  After each use, I wash mine with soap and water.


After you get the first piece of paper glued down, simply repeat the process with the second piece of paper.  At this point your bucket will be totally covered.


Now comes the fun part! I cut a cute little paper doll dressed as a black cat for my bucket.  You could add anything here for embellishment...monsters, vampires, Starwars characters, etc.  You can decorate your bucket with stickers, cut pages from books, or let your children draw something on their buckets.


I also added a little extra bling to our bucket.  I used one of the Podgeable Shapes to make a little pumpkin bucket for our black cat girl.  Then, I painted the cat suit with Extreme Glitter in Black from Folk Art, wrapped a feather boa around the handle, and finally finished each side off with big orange satin bows...very blingy indead!


The last thing I did was really fun.  I paint the entire surface with the Mod Podge Glow-In-The-Dark Fluorescent formula!  I went with 3 coats to be sure to get the best effect, and we love it!

My only regret is that the Glow-In-The-Dark formula doesn't photograph well in the dark.  I tried my camera on every single setting, but it was a no go.  I can promise you though, the effect is sooo cool.  Kate keeps taking her bucket in her closet to see.


It's not quite time for Trick or Treating, but she is absolutely ready to go!

If you have been afraid to try Mod Podge, please take the leap...you will love it!  There are so many fabulous formulas, and I cannot wait to use them all and share with you!

Wanna keep up with Mod Podge and Plaid Crafts?  
Be sure to follow them on FacebookTwitter, and Pinterest.

This post is sponsored by Blueprint Social and Plaid Crafts, but rest assured these opinions are absolutely my own.

Happy Halloween Y'all!

Make sure to check out these Mod Podge projects as well...


;
~Jessica
facebooktwittergoogle+pinterestemail merss feed
Linking up at:
DIY Club

Fall Tablescape with World Market


Last weekend, I had the opportunity to shop for my Fall tablescape at one of my favorite stores, World Market.  What an amazing store!  Their selection of home decor and kitchen ware are amazing, and really reasonable priced.  I created this cozy dinner for two using some of World Market's amazing Fall decor.  


The first thing I spotted were the sweet Pumpkin Bakers.  We are using them for soup, and I can't wait to make some delicious bread pudding in them.  They are so fun, and really add the perfect Fall touch.  I chose the Hurricane with their Mexican Pumpkin Candle for the centerpiece.  It smells absolutely amazing!


I fell in love with the Natural Fiber Pumpkins, and added them for an extra Fall touch.  I really love chalkboards, so of course I had to add a Mini Easel Chalkboard and these adorable Chalk Talk Napkin Rings!  


I am so lucky to have a World Market store in Louisville, which is only an hour away for me!  If you don't have a World Market in driving distance, you can easily shop at World Market Online Store.


Their Fall assortment is amazing, but they offer so much more...


World Market's kitchen section is my absolute favorite!  I bought the aqua baker on the bottom shelf for myself along with some of the red ramekins.  You cannot beat their prices!


Did I mention their glassware?  Every time I go, I usually buy four new wine glasses.  Their stemless wine glasses are my favorite, and are less than two dollars a piece...no kidding!

Even better...World Market and HGTV have teamed up and are holding a sweepstakes that you can enter!


HGTV Passport to Style Sweepstakes

  • Grand Prize package includes: A $10,000 World Market shopping spree and design consultation with an HGTV Designer
  • There will also be 3 runner up prize winners that will each receive a $1,000 World Market gift card!
  • The HGTV Sweepstakes runs from September 22, 2012 until October 26, 2012.
  • If you share the sweepstakes with 5 of your friends (via FB share or email) you can receive 5 additional bonus entries. This is part of the registration process when entering. Users can also enter daily for more chances to win.
  • Enter online at http://worldmarketsweeps.com  or https://www.facebook.com/worldmarket/app_315124871876517

Want to keep up with World Market so you don't miss a thing?  Follow via TwitterFacebookGoogle+Pinterest, and Instagram!

This is part of a social shopper marketing insight campaign with Pollinate Media Group™, but all my opinions are my own.

Happy Shopping!


~Jessica
facebooktwittergoogle+pinterestemail merss feed

Fortune Teller Costume


Halloween is coming, so it's time to start thinking about costumes.  Usually, we purchase our children's costumes. This year, thanks to RIT Dye, I decided to try to make one myself.  

Kate already has a black cat costume, but she wanted to have a different costume for a Halloween party she is attending.  Since costumes can be pretty expensive, I challenged myself to use things we already had around our home for this one.  We decided on a Fortune Teller Costume.  It was so fun picking out items to repurpose using our RIT Dye!


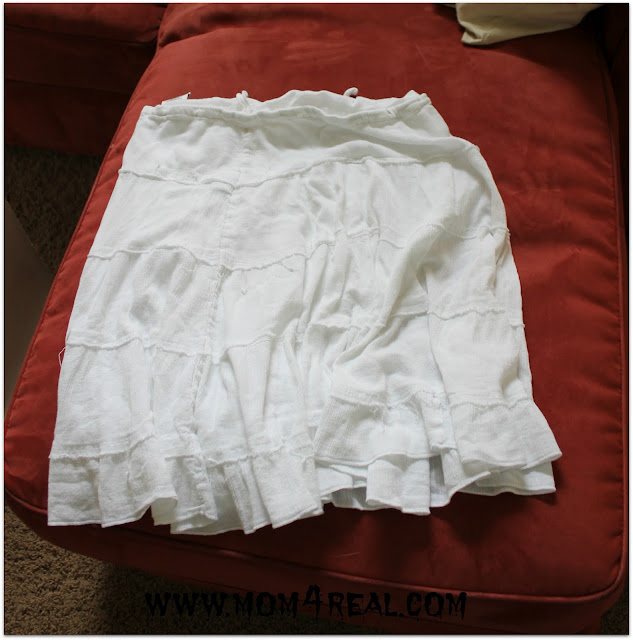
I had this skirt from years ago that was just dying to be brightened up!


I rolled it up lengthwise and tied it with rubberbands in different places.


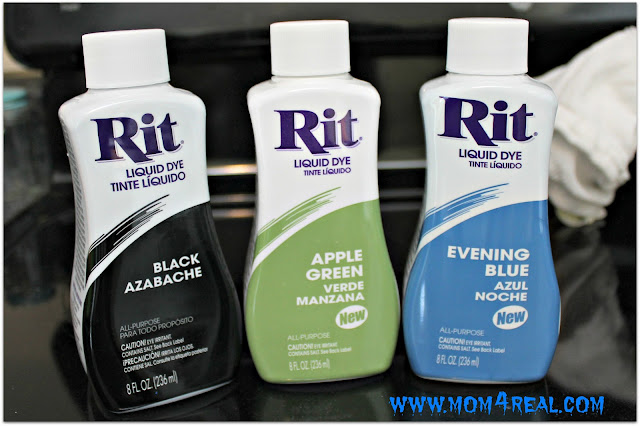
Next, we picked the colors we wanted to use.  We went with Black, Apple Green, and Evening Blue.


Now, start the dying process.  Since our project wasn't very large, we decided to use the stove top method.  We got a medium sized pot and filled it about 2/3 full with water, and brought to a boil.  Then we turned the pot off completely.  We were dying cotton, so we added some salt to the water, then poured in about 1/4 of the liquid from our dye container and mixed well.  We started by dipping the bottom portion of our skirt into the Apple Green Dye.  We let it sit in the dye bath for ten minutes, then pulled it out using tongs.  Next, we transfered it to the sink and rinsed with cold water until the water ran clear.  


Next, we used the Evening Blue dye.  After getting the dye mixture ready, we dipped the middle part of the skirt into the blue dye, and repeated the above process.  After ten minutes, we removed the skirt from the dye bath and rinsed in cold water until the water ran clear again.  Now to finish the dying process, we took the top of the skirt and dyed it black using the same method.  

Now you simply cut off the rubber bands, then wash and dry!

We also died a white scarf using the Apple Green and Black dye to use as a headband...every Fortune Teller must have a headband, right?


Add some fun jewelry and some props, and you are ready for business!

You can stay up to date with RIT Dye products and fun projects by following along on FacebookTwitter, and Pinterest!


Happy Halloween and may good fortune find you ;)

 This post is sponsored by Blueprint Social and RIT Dye, but rest assured these opinions are absolutely my own.
~Jessica
facebooktwittergoogle+pinterestemail merss feed
Find even more fabulous RIT Dye projects here...

Sharing at:

momnivores dilemma
DIY Club
DIY Showoff